This post is actually going to be made up of two parts! Today I'm going to show how to get a slip knot, casting on, and choosing the right needles and right size yarn. Next post to Knitting 101, we will be working on the first knitting project for this blog!
I had a few helpers to show me with this post, including McKendree from GodisLove! Knitting with a group is the best way to learn!
Supplies:
I believe that the easiest needles to learn to knit on are BIG ONES. I like to use size 13 needles. I bought shorter ones and found that it is much better to buy longer ones, like these that my friend owns:
Along with big needles, thick yarn is best too! Some of my favorite brands are LionBrand and Loops & Threads. Be mindful, depending on the how long you want your project to be, you may want to buy more than one ball of yarn.
The Slip Knot:
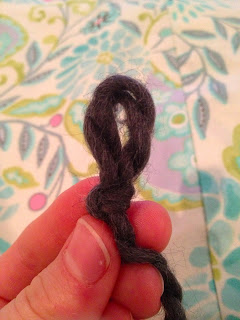
Remember when you first learned how to tie your shoelaces and how you had to make the two bunny holes, or
Oh and here are a few videos to help you cause I know just words can get confusing. I had tried to take a few photos, but they were just more confusing :)
Casting On:
Now that you have your slip knot, it is time to cast on! Videos are also posted at the end of these photos for help with casting on, but I took a litte better quality photos so thought that I would include them!
1. With your slip knot on the needle, make a triangle with the string and your thumb and index finger- with your tail pushed out by one finger and the string from your ball pushed out by the other. Now grab the string hanging down with your 3 other fingers.
2. Take your needle and put it on the OUTSIDE of the string that is wrapped around your THUMB, like the following:
3. Slip in under and through the hold so that it comes out looking like this:
4. Take your needle and bring it to the string held by your index finger.
5. Go over the string and through the hole.
6. The next part is the trickiest and the hardest to take a picture of, as you can see from my beautiful photo... But take your thumb and the loop on it and bring it over the needle so that loop goes onto the needle once again. Now slip your thumb through the loop and pull the strings
7. Slip your thumb through the loop and pull the strings to tighten the stich.
Now repeat steps 1-7 until you have the number of stitches that are needed for your project. For the project that I am working on, I needed 10 stitches.
Helpful videos:
Making basic slip knot!
Making basic slip knot! (#2)
Slip knot and casting on!
Casting on- similar to pictures but all in one video!
Hope that this post helped or inspired any of you who are wanting to learn how to knit or just need to catch up on the basics, and if you have any questions, please leave a comment below or send me an email!
Happy knitting and hope everyone's off to a great week!
BELLA


You are great Bella.
ReplyDeleteAfter reading your blog I'm considering seriously to get into knitting. I'll let you know about my progress.
Love you
OBA